Uploading Sessions
Access the Sessions page using the expanding menu on the left:
- Move the mouse cursor to the left side of the screen
- Click on Sessions (
):
Note
We recommend you check out how to add a session before reading this. There you’ll find a more comprehensive description of the information required to create a session.How to add multiple sessions?
- From the Sessions screen, click on the ▼ Options menu at the top right of the screen and then select “Upload Sessions”.

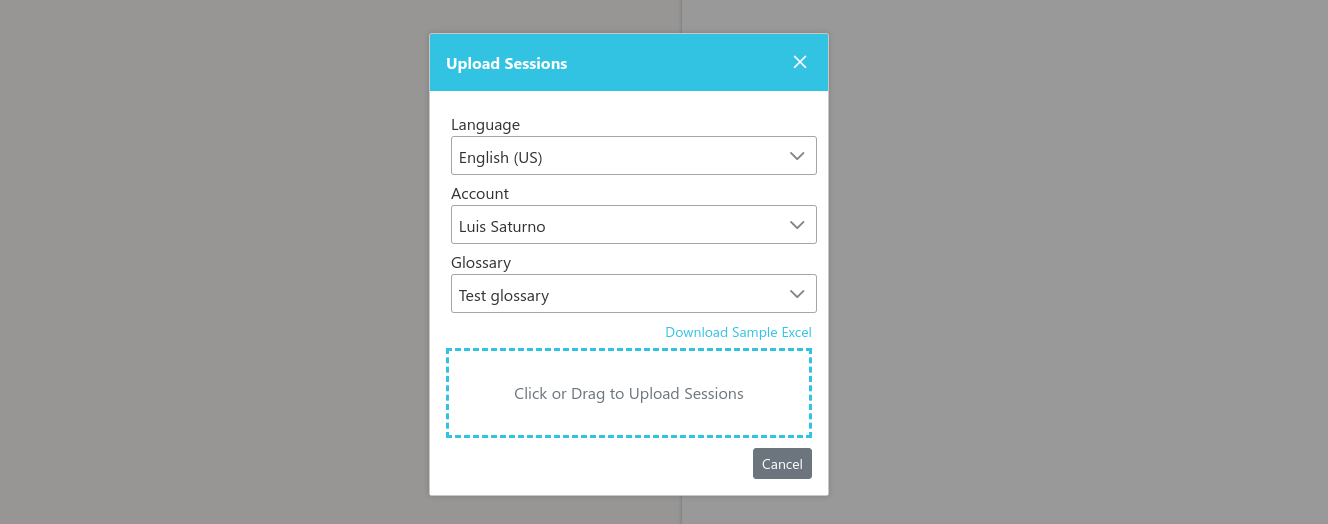
- It should open the “Upload Sessions” dialog. This screen allows you to upload a spreadsheet containing data for multiple session.

Before creating the spreadsheet
After setting these defaults, the corresponding columns can be omitted from the spreadsheet if only the default values are required.
How to create the spreadsheet
- Click on “Download Example Excel” and open the downloaded file.

- Fill the spreadsheet
The downloaded file includes two rows:
- The first one is the header and should not be removed or edited.
- The second one is an example row to use as a reference. You can remove this row or replace the example values.
Fill out the spreadsheet with information for the sessions you wish to create. A new session will be created for each row in the spreadsheet. Below is a description of the values expected in each column.
| Column | Expected information |
|---|---|
| Title | The name of the session. It can be any text. |
| Presenter | The name of the person that will be speaking; also accepts any text. |
| Date | The day the session is planned to start. It should be in the future and preferably it should be formatted as a date using the spreadsheet software used to edit the file. |
| Time | The time the session is planned to start. It can be any text using 12hs format or 24h format (i.e. 1:00 PM or 13:00) |
| Timezone | The local timezone or region where the session will take place at the specified time. It can be a timezone name (PST), city (Los Angeles), any GMT/UTC offset (UTC-4:30), or just left blank for your default timezone. |
| Duration | The duration of the session. It can be specified in minutes or time (i.e. 95 or 1:35 ). |
| Glossary | The glossary to use during the session, or blank for the default. |
| Account | The account to bill for the session, or blank for the default. |
| Language | The language used by the person that will be speaking and from which the Wordly will be doing the translations, also you can leave blank for the default. |
Note
Glossary, Account, and Language can be left blank and the information selected in the upload dialog will be used as the default.Uploading the spreadsheet
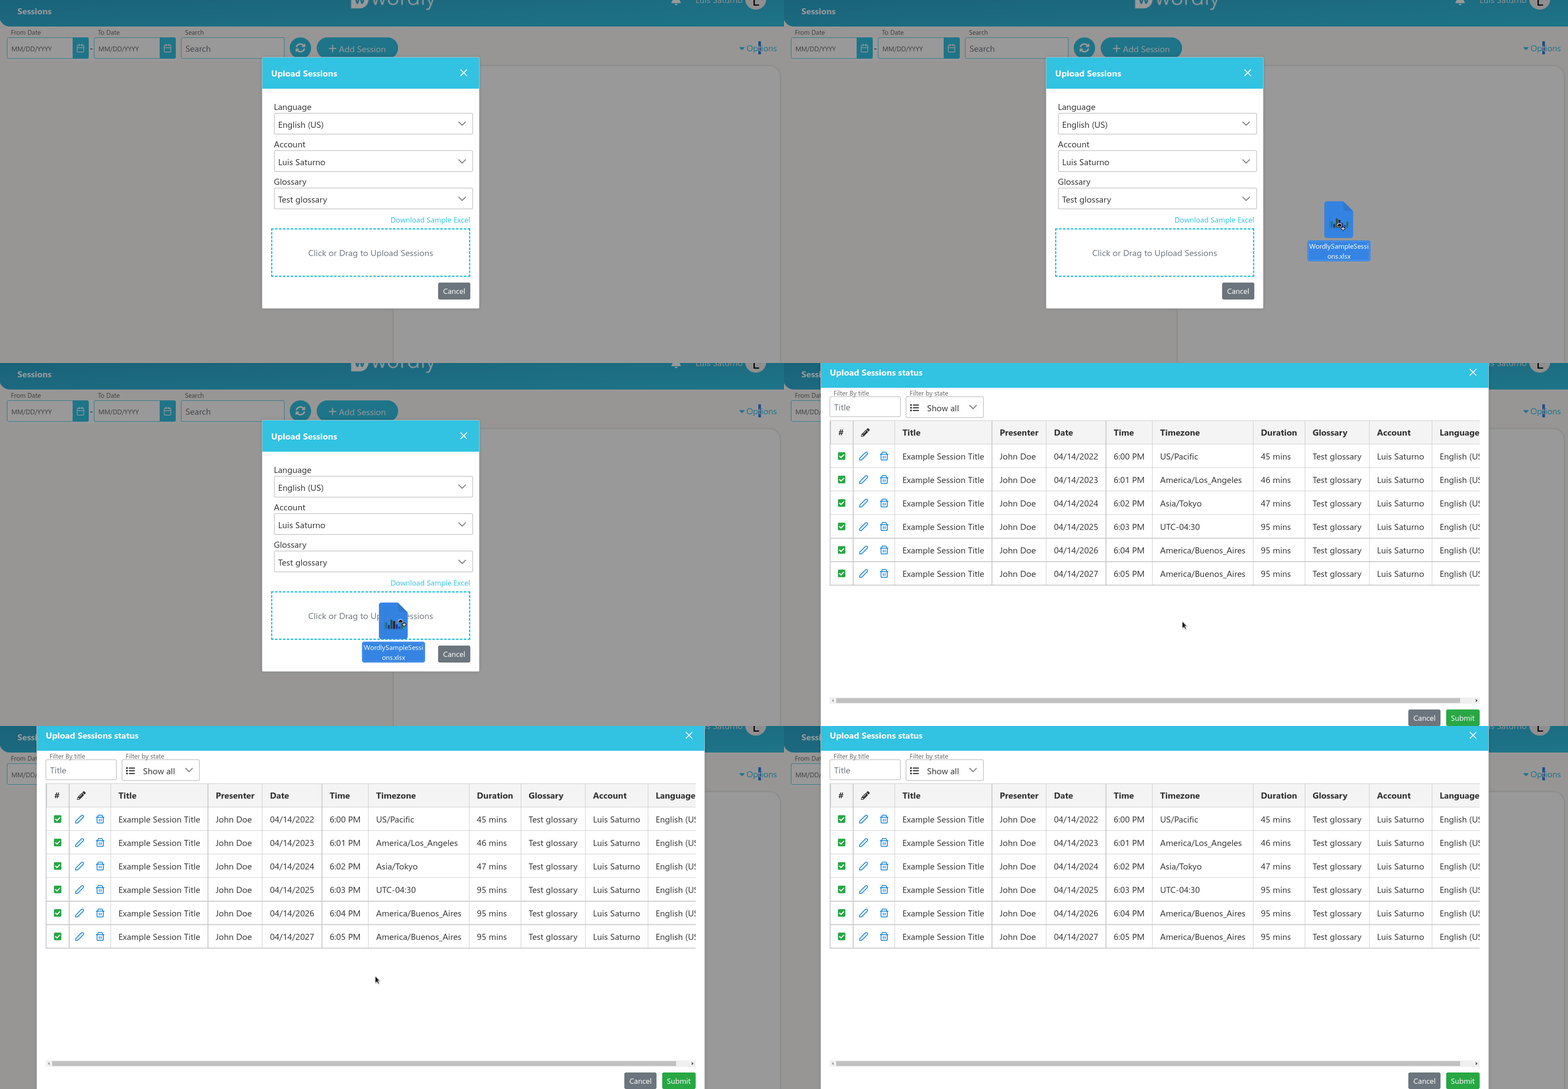
Once you have added your sessions to the spreadsheet, save the file (the name can be changed) and use the upload dialog to upload the file to Wordly.

Reviewing and submitting the sessions
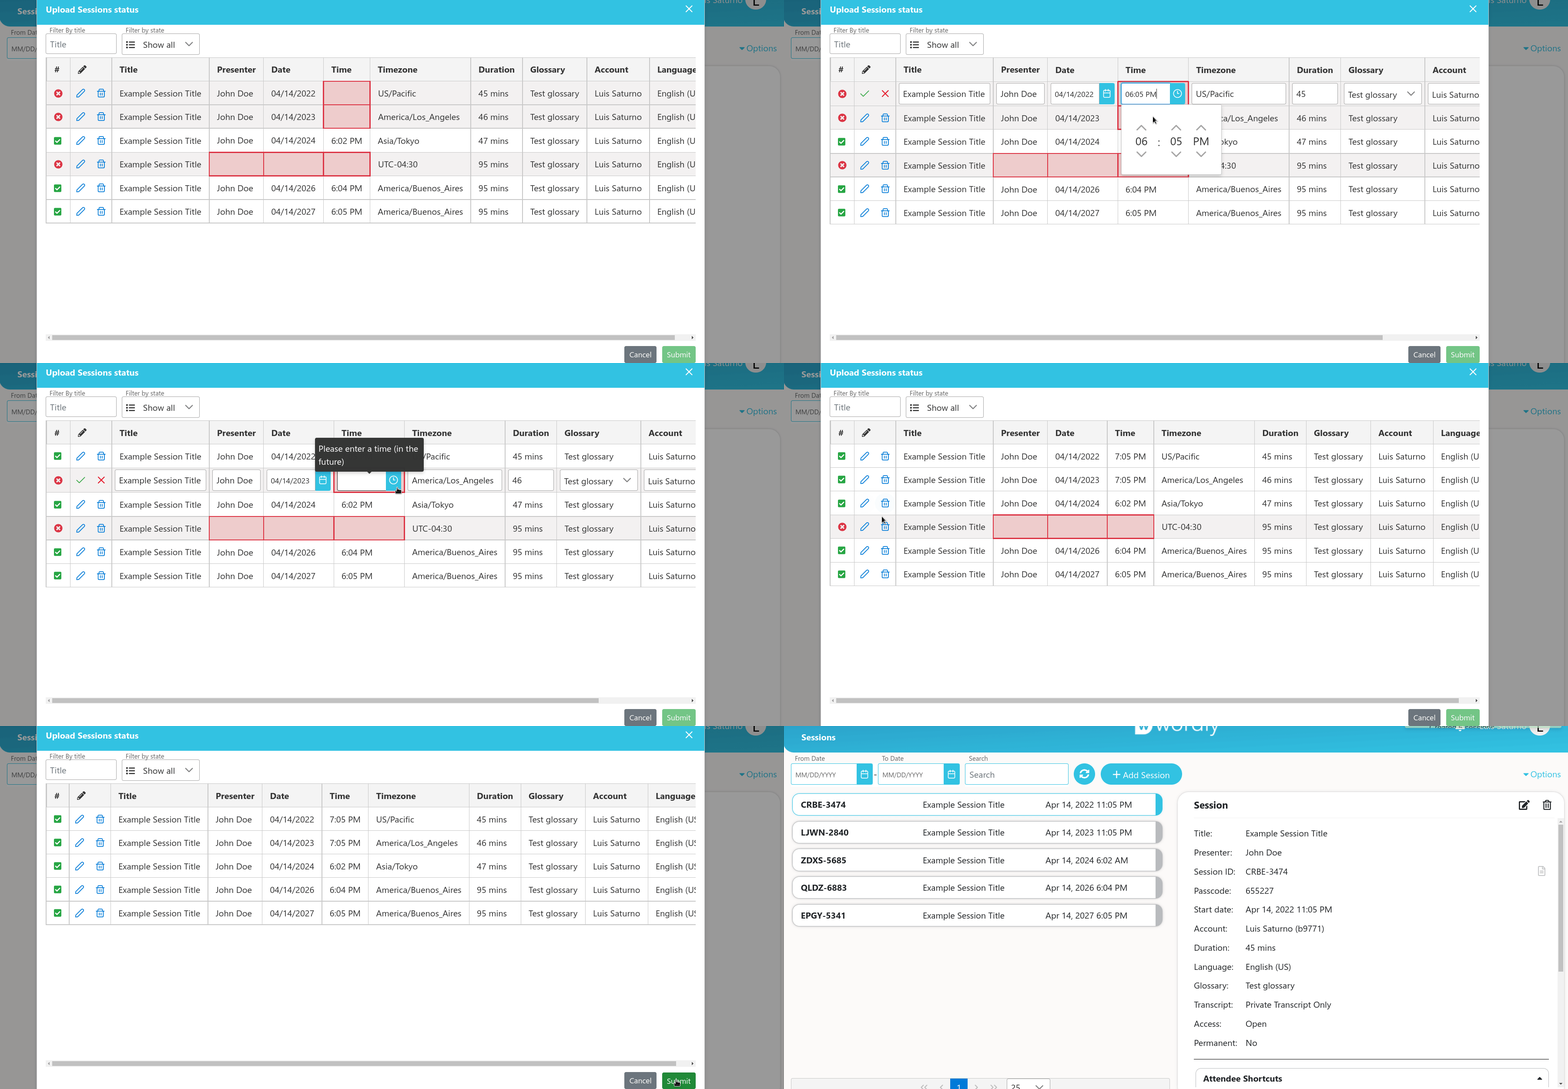
After the upload process is finished, the Portal will present the session information for your review. If there are any errors, the incorrect fields will be highlighted in red. All incorrect fields should be fixed or removed; otherwise the Submit button will remain disabled.
Click the pencil icon to edit the row you want to fix, or click on the trash icon to delete it. Once all rows are fixed and you’re happy with the changes, click “Submit” to create the sessions.

Feedback
Was this page helpful?
Glad to hear it! Please tell us how we can improve.
Sorry to hear that. Please tell us how we can improve.